How to make a spirograph and cycloid
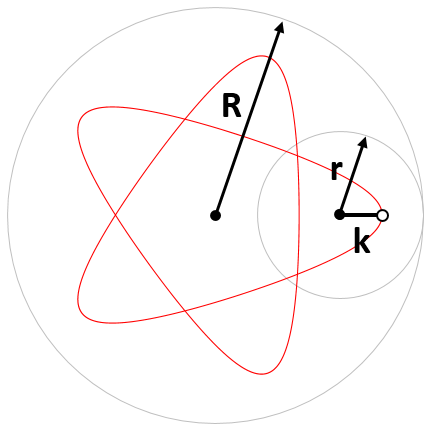
In not so long ago, when computers and printers were not yet widespread, it was rare to create symmetrical geometric shapes. We created snowflakes by cutting out folded paper or drawing a cycloid using a spirograph. A cycloid is a curve drawn by a point rolling a circle over another circle. The branches of cyclodida then resemble a flower or a snowflake. The mechanical aid for creating a cyclodide is called a spirograph. These are two gears that roll off each other and a cycloid is drawn in the hole with a pencil. Below are instructions for making different types of spirographs.
Simple spirograph
A simple spirograph can be made by recycling things that would otherwise become waste. Just look around and find suitable objects.
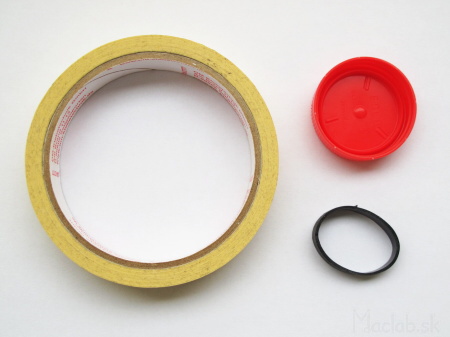
A roll of adhesive tape, a plastic lid and a rubber band.
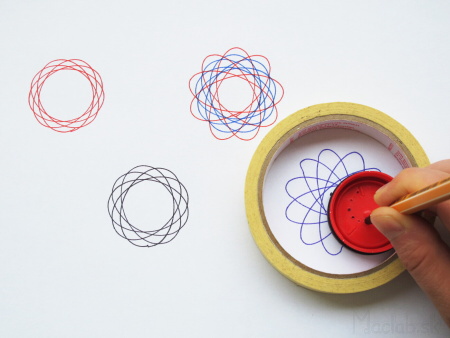
We make a few holes in the plastic lid, at different distances from the center. So that the holes are not close to each other, it is advisable to spread them in the shape of a spiral. But it works even if they are placed differently randomly. We put a rubber band on the edge of the lid to increase the friction between the inner and outer circle. Then we draw the cycloid with only circular movements.
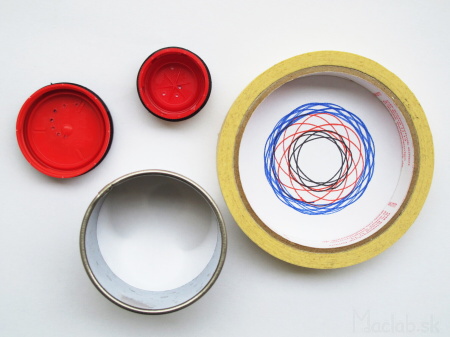
We can experiment with different diameters of the inner and outer circles.
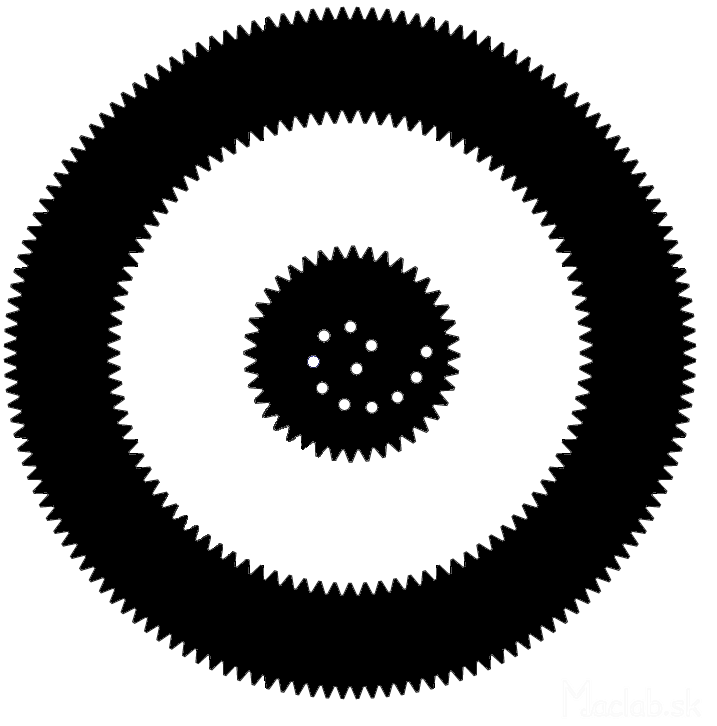
Wooden spirograph
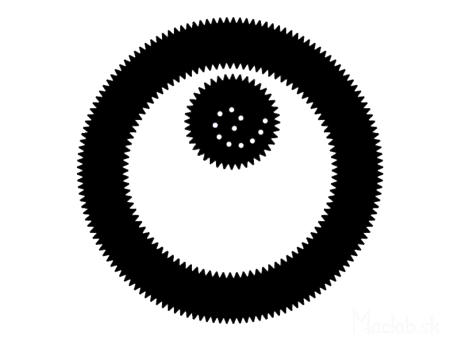
The plastic cap spirograph works pretty well, but it starts to slip when the holes are too close to the edge. It is therefore advisable to use two gears to prevent slipping.
Laser engraving: PNG
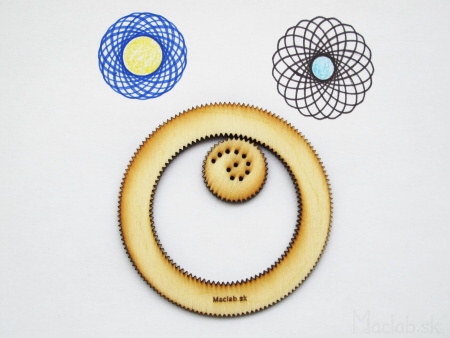
With the help of a laser, I cut two gears from plywood, which do not slip, but again at the holes near the edge, the resulting forces act in such a way that the small gear is pushed up from the pad. Also, I found that external gearing on a large circle is pointless because my hands cross when drawing and I can't do multiple revolutions.
3D printed spirograph
Although the wooden spirograph was better than a simple plastic lid, it would have wanted to somehow create a rim that would prevent the inner wheel from being pushed out.

So, in the third, I created a model for 3D printing. I also added triangular shaped holes that create flat edges on the cycloid branches. STL for download: Inner , Outer.
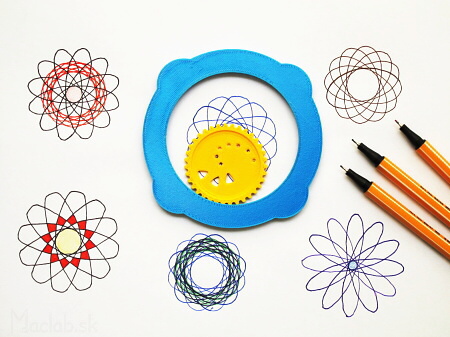
But the printer has a worse resolution than the laser. Some of the teeth were not pushed out perfectly, but thanks to the rim, the inner gear is no longer pushed up.
Parametric equations
The advantage of computer calculations is that we can simulate and check different radii of circles in advance and thus have a hypotrochoid drawn. Below are its parametric equations:
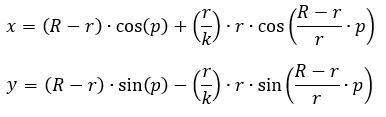
Parameter p is the angle in radians, R is the radius of the outer circle, r is the radius of the inner circle. Dimension k is the distance of the pencil hole, measured from the center of the smaller circle.
Regarding the dimensions, the most important is the mutual ratio R/r, which determines the number of branches. Thus, if R/r=3, we get a three-pronged shape called a deltoid. If R/r=4, we get a quadrilateral shape called an astroid. But if R/r is some decimal number between 3 and 4, we get many branches of the general hypotrochoid. Some samples are plotted below.
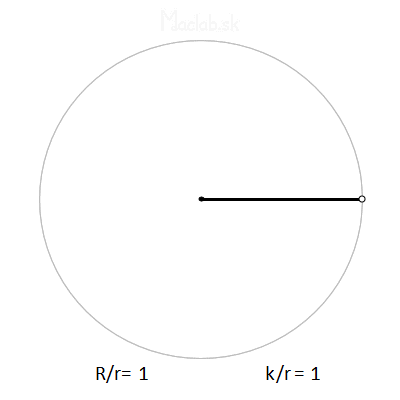
The k/r ratio indicates the position of the pencil hole. Theoretically, if the hole were located on the edge of a small circle, then k/r=1 and we get sharp shoulders. If the ratio k/r decreases and approaches zero, we get arms ending in an arc or a loop.
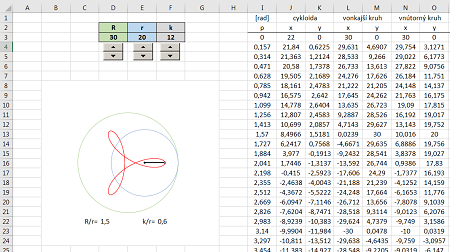
All figures were generated using equations via Excel. Interactive file for download: spirograf.xlsx