How to make a knife
Technological advances in production knife at home
Technical note: this is only word to word translated text.
Knife of old as a tool for cutting meat and working wood. Its simplicity and efficiency also meant that is still used in the modern era. Each knife is its shape and materials designed for specific types of activities. This article provides a photographic guide as we can personally make survivalový knife, sometimes also called bushcraftový knife. Thus, for primary use in outdoor.
It may seem that some steps are skipped in the instructions. It's because I also worked on the handle and the blade. In the text, a few paragraphs of additional information written in small print. You can skip crank.Alternatively, you can now prejisť the production casing .
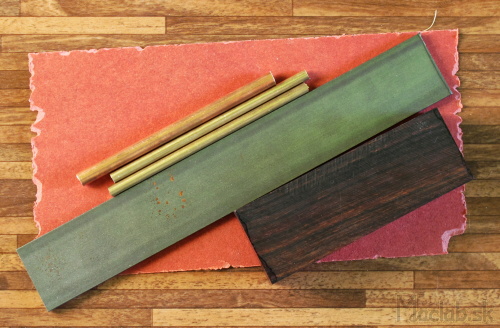
For production we will need a knife: steel plate, a wooden beam, metal rods and fiber.
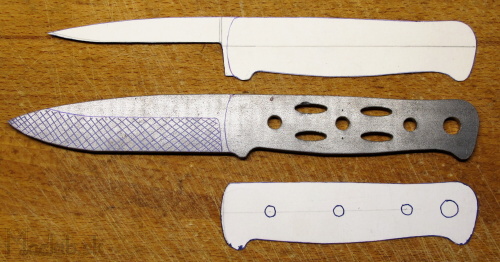
The draft overall shape
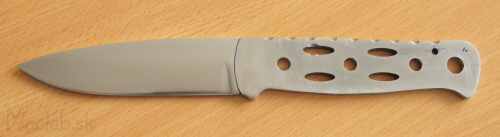
To design the shape and thickness of the blade falls. For these types of knives used greater thickness. Usually 4mm to withstand the splitting of wood.
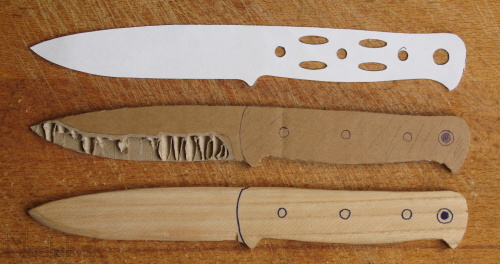
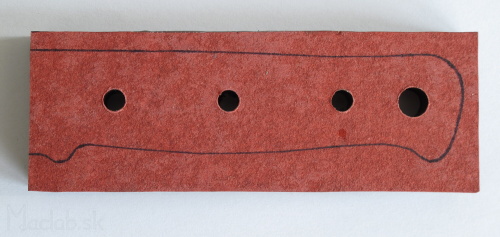
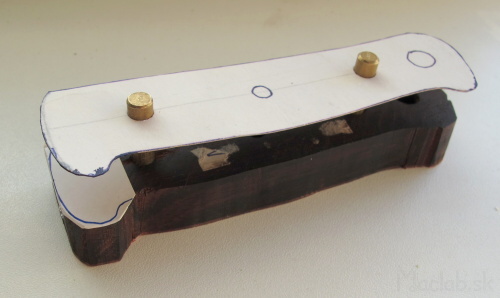
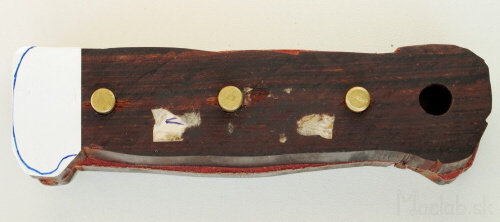
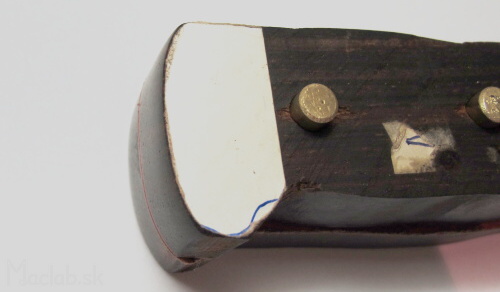
Outer contour is chosen so that the knife fell to its shape well in hand. First, draw a basic shape. This shape is a good pass on cardboard or wood. I used a wooden plate 4 mm thick. I got the exact model of the future wood cores.
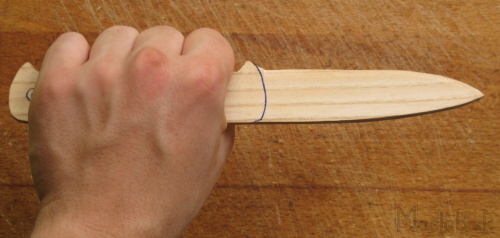
On the wooden model I coerce some adjustments. These I transferred back to the drawing, so I reached the optimum shape.
Drawing
Already drawing accurately indicates the outlines of future openings including the knife rivets. Ellipses are designed to reduce weight. Last is the biggest hole for hanging on a knife lanyard. Drawing can be downloaded in multiple formats. The individual levels are drawing dimensions and other additional information.
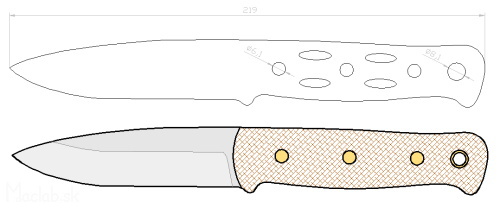
Download drawing in the format: DWG , PDF , JPG , XLS
Selection of material
Steel is an alloy of iron (Fe), carbon (C). The line of cutlery, for simplicity, the expressions carbon steel and stainless steel. Although both contain carbon steel. Stainless (joints) steel contains solid solution in the amount of chromium (Cr), to guarantee corrosion resistance. Increasing the amount of carbon up to 1 wt.%, The greater the hardness of the material. Carbon steel has the advantage that it achieves a higher hardness than corrosion resistant and hence a sharp knife will last longer. Only a small change in the amount of any element Ingredients, significantly changing the properties of the price and of course material.
Carbon steel: Fe + C + other components Ingredients
Nehrzavejúca steel: Fe + Cr + C + other components Ingredients
The most common materials for the manufacture of blades
BS 14240 - Carbon steel for springs
BS 19314 - tool steel cutting tools for the production of
K 110 - part corrosion resistant steel
440 C - conventional corrosion resistant steel to make knives
RWL 34 - Corrosion resistant steel produced by powder metallurgy
For the best value properties koróziivzornosti / strength / hardness I chose steel RWL-34
Description of steel RWL 34
I bought the material in the form of steel strip with a thickness of 4 mm material. Comes in a state of hot-rolled with a hardness of 30 HRC.
It is corrosion resistant martensitic steel produced by powder metallurgy method. Melt (liquid metal), the nitrogen gas is sprayed an aerosol. During the melt dezitegrácie form small droplets which solidify before they touch the container or other drops. Thus we get the material in the form of fine powder.
The powder is placed in a container of low-carbon steel (metal container). The container is closed after vyvákuovaní air welding the hole. The container is subjected to high pressure and temperature isostatic press. Here occurs sintering metal powder grains.In addition to temperature and pressure play a major role in speknaní the time. We get the material with a very fine structure, where grain size is comparable to the particle size of the original powder. After sintering, the material rozvalcuje to shape metal.
Fine grain structure adds new material properties. According to Hall-Petch effect: if you reduce the size of a grain, enhancing the strength. Strength is defined as resistance to the violation. Rupture always starts at its weakest point.
Weakened at the point of the microstructure we mean carbide grain boundaries to exclude or adverse odmiešavanie ingredient elements during solidification. Since atimizáciou very small volume of solid very quickly odmiešavanie is negligible and carbides are eliminated inside the grain. Moreover, any defect microstructure is smaller than the size of a grain of powder.
Chemical composition of steel RWL34
| RWL34 | C | Si | Mn | Cr | Mo | In |
|---|---|---|---|---|---|---|
| hm. % | 1.05 | 0.5 | 0.5 | 14 | 4 | 0.2 |
Metal cutting
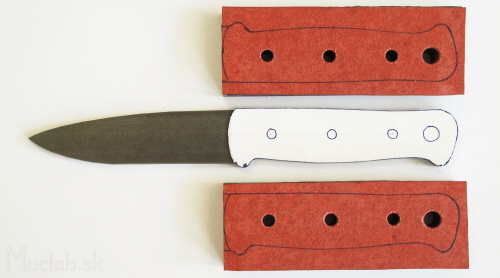
As I have chosen the way of cutting water jet cutting. Water under high pressure flows through the narrow nozzle and abducted abrasive particles. Movement of water jet driven by the computer according to the drawing.The advantage is that the material is in no way affected by heat and výrezok the exact shape as the drawing.

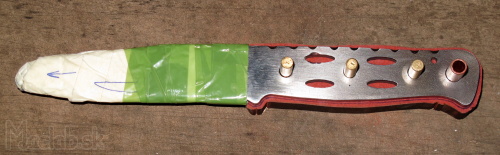
The material traces the contours of the blade according to a paper template. Material is purchased by the length of the blade, but I left the sides of the allowance that it can be clamped plate.
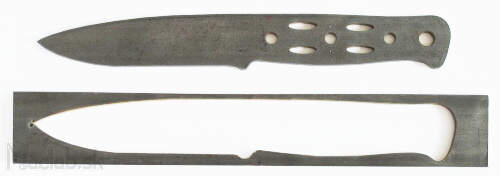
Next we cut out the shape of the laser. Laser is fast and accurate, but at the cut comes to overheating of the material. As a last resort, we can use the angle grinder (karbobrúsku). In addition to the large heat effect is it wrong for carving inside curl. Výrezok must then be machined have enough files.
Sharpening of edge
The cut we mean the shape of the island in its cross section. Is there are many types of cut and therefore we have to choose one that best suits the purpose knife. The cut is made above, the knife has a better cutting properties, but the blade is thinner (smaller angle) and prone to damage. The island is lower by a thicker, stronger but less well penetrates into the material during cutting.
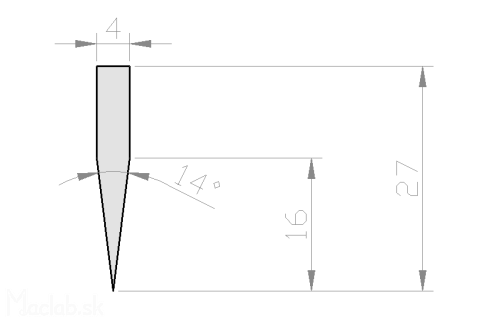
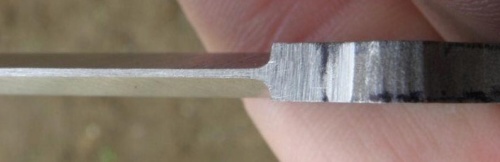
I chose the wedge-shaped cut, which is a high 60% of the total blade. These values are only approximate.
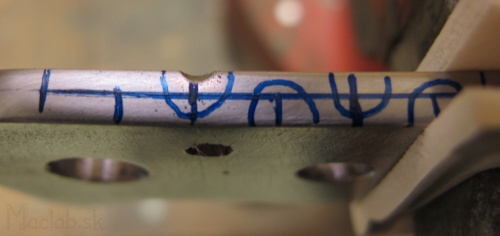
On výrezok according to a paper template indicates the amount of cut. On the surface, where it will later Plot blade center plate. We will make it simple so that you put on a flat plate and a 4 mm drill tip drill we do mark.For better visibility, it is appropriate that such black out party. a spirit in black marker.
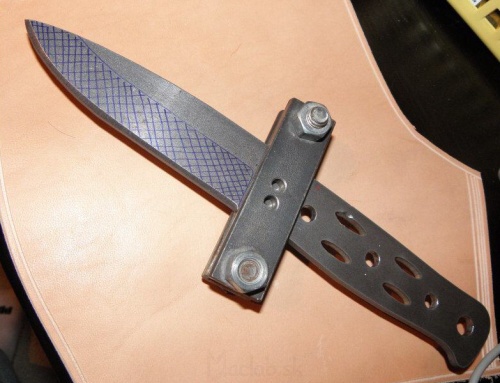
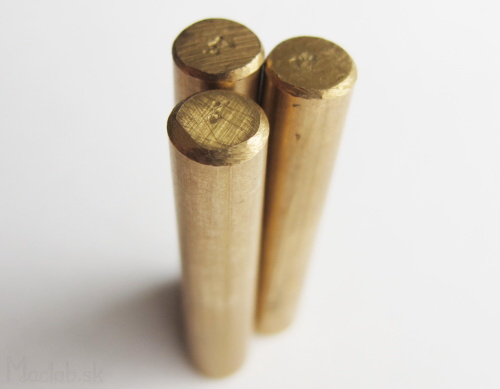
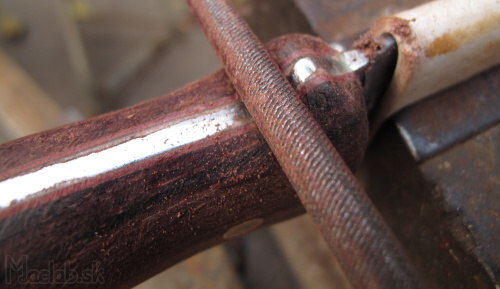
To help produce a cut in the najsymetrickejšieho ricasse can produce the steel guides as shown above.
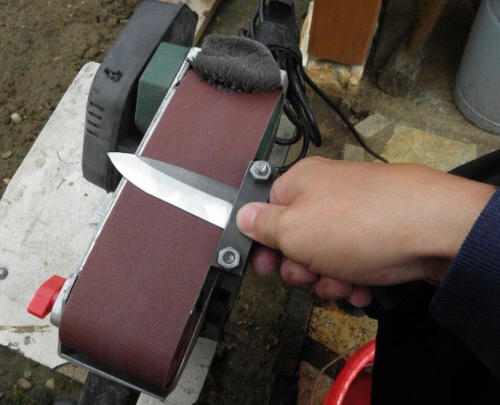
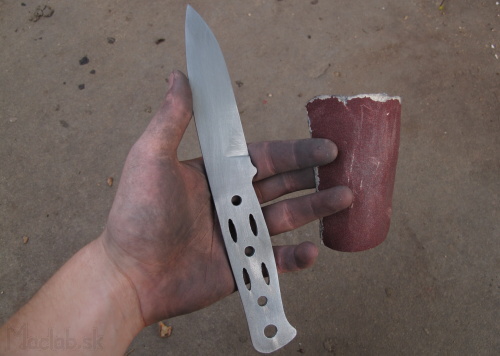
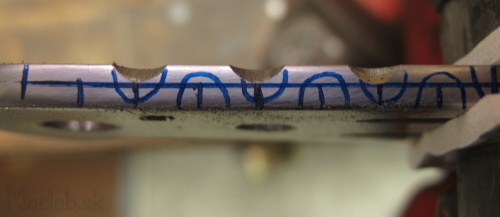
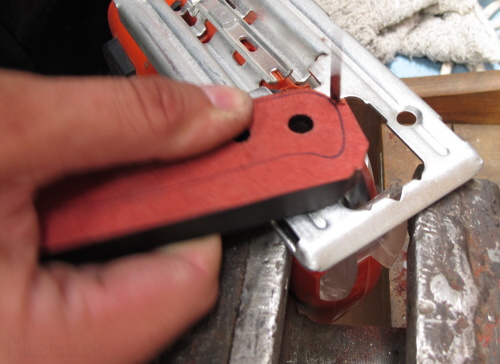
To start creating a rough shape of the blade - designed shape of the cutting wedge, it is not yet sharpened. If we do not have desktop belt sander, you can use the hand belt sander, so that it turned upside down. Gross can be done to select the files, but it is decent haul.
Generally, the grinding of metal on the belt sander, it is appropriate to have SANDERS speed greater than 15 m / s, according to information from the forums and literature is the most common rate of 25 to 30 m / s. Grinded blade itself is quite a delicate thing. The basic rule is nebrúsiť blade only one place, but always make a smooth move from the grinder ricassa (place where the edge ends at the handle) to the tip - this will avoid uneven grinding and made wavy blade, which is more than adverse
Rough cut of the band doing 60 grit. Knife shifted to an angle of less than 45 ° and slowly grind and expands toward the spine edge blade. Refrigerate so often that our knife in the hands of Nepal and in the meantime still check cut as close to the line drawn by the amount of cut (Brussels so that we leave 1 mm margin Due next finer grit belt). In this step, it should be in the hands of feeling and try to feel the fingers of the right tilting blade that we have not produced it to the abdomen, but to Brusilov nice flat surface and still try neprebrúsiť blade drawn over the line and also neprebrúsiť already polished 1.5 mm the island. Also seen from the tip of the blade surface symmetry check up on the cut surface and also a top view of the tip apex symmetry cut.
If both sides have achieved the desired finish, go to the finer belt - 120 grit and lightly sand the surface in order to remove traces of the previous grit. The cut is no longer try stretching up. After 120 grit on the blade remains at approximately 1 mm, we can continue to taste the finer the grit. However, the cheap belt sander is sometimes a problem to get belts with finesse greater than 120 grit.
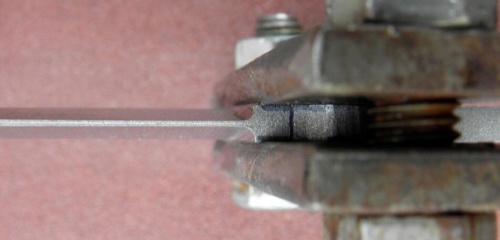
Note - for hobby and professional belt sander will also set the lap belt surface to a metal sheet grinders. Here we try to always be set such that the edge of the pad is flush with the belt and the island in the Brusilov ricasse evenly.
Blades must be symmetrical around Wed
On the cutting edge of a small allowance to let the final dobrúsenie after hardening.
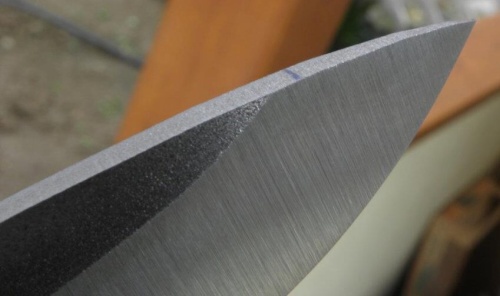
Island off the tip must also be symmetric.
Knife with a rough cut.
Grinding and polishing of the surface
Following the establishment of cut (blades coarsely), followed by grinding the surface (šmirgľovanie). Grinding softens the surface roughness and then polishing it up to a mirror shine.
Even before šmirgľovaním, all inequalities of files is treated for water jet cutting. Waterjet moves along the broken curves and the point break and round shapes are a bit square. On long sections of direct water jet creates tiny wavy.
Round of files oblú align the Auspices of the fingers.
Flat file to align the spine and upper edge of the blade where it comes wooden handle.
When we're finished with the file, we sandpaper smooths the surface. Either attach the sanding pad and move the mat knife or a knife attached to the pad and hand sanded surface. When sanding by hand, from the cut edge becomes slightly convex.
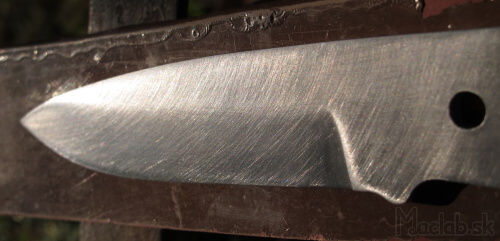
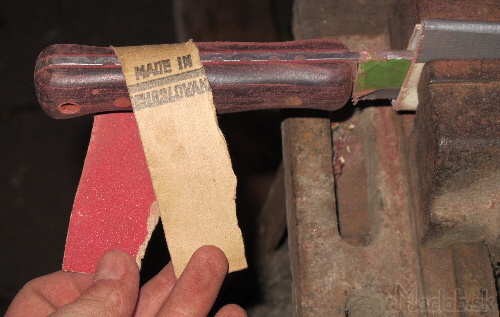
To remove traces of rolling, we use coarse sandpaper and a minimum of 60 grit. Gradually to a finer abrasive papers. We are trying to hone in one direction and the transition to finer in the direction perpendicular to the grooves. If the new scratches covered with old, we know that we got to the level currently used grit roughness.Abrasive papers wear out rather quickly. After a while grinding I had to take a new one.

We continue grinding until finely 1200th If the abrasive particles wear paper 1200, report as sandpaper grit would be the 1500th Thus to shine as a dull mirror. As the picture above.
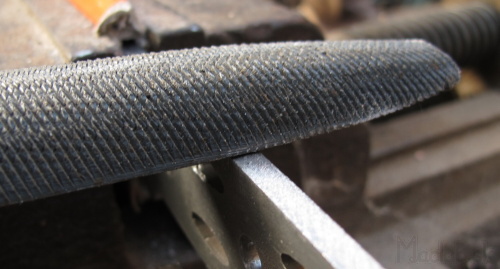
Filework
Filework stands for ornaments created files. Must be made prior to quenching, the metal zakiaľ soft and easily machined. There are many shapes and ornaments. You can just search for pictures titled filework.
First, try a piece of ornamental wood or scrap metal.
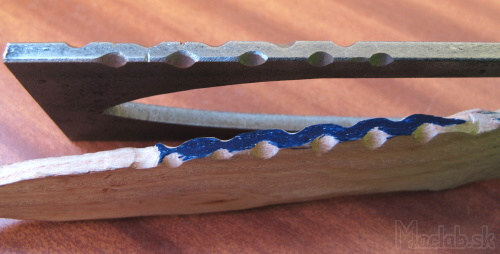
Wood it is easy, but the metal is machined worse than wood. Therefore, I chose the simple curl.
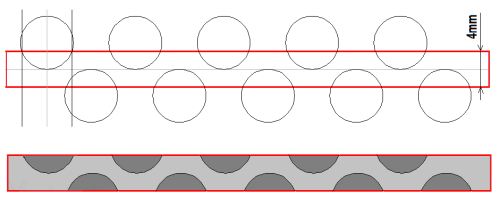
The size of curl depends not only on the average file, but also the depth to which the material machined.Rozkreslíme the future shape that was filework pretty regular.
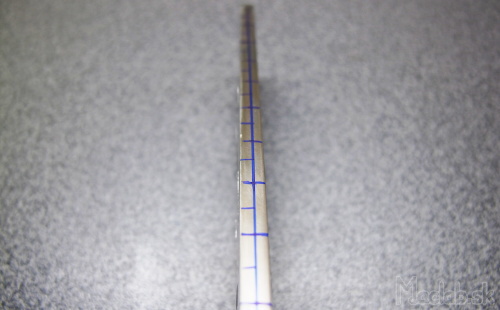
Size markers transfer that to the knife.
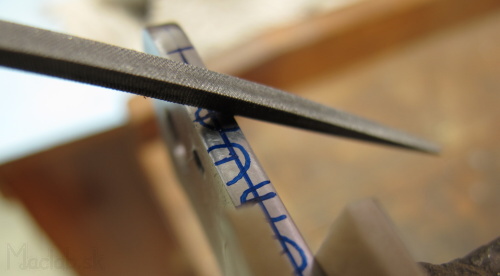
The mark of files do little triangular notch. Then we take a round file and a notch extending to the circular.
We are trying to cut evenly spread by the brand.
I went notches until the mid-thickness of the blade, so the center line.
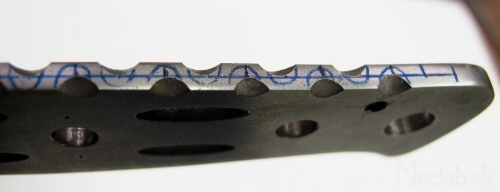
Dents create alternately in one and the other side.
I just created notches in the handle, to me at carving netlačili finger.
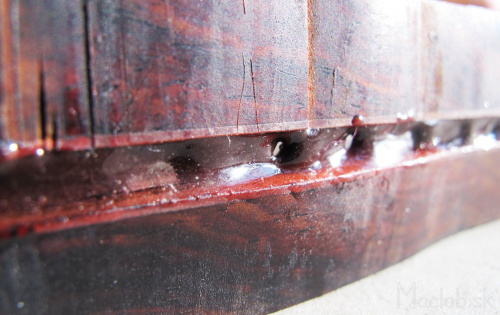
Before quenching the blade, I drilled a small hole yet, which comes into tritium.
Heat treatment
Heat treatment affects the properties of the steel. The factory steel plate in the annealed condition. Its hardness is relatively small as it is for steel RWL 30 HRC. In this condition, well machined. Rough sanding, drilling and filewor, we need to do prior to quenching.
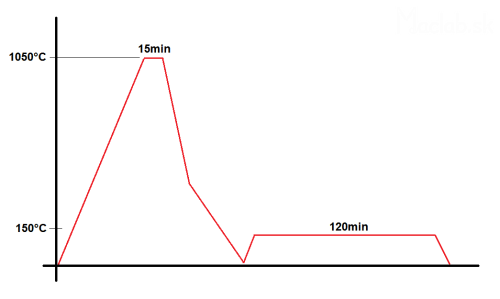
Proposal for heat treatment of steel RWL34
Quenching achieve higher hardness steel. During the heating temperature for hardening steel reacts with oxygen at elevated temperatures. On the surface oxides formed and can also come to the decarburization of the material. The resulting oxides are difficult to remove and decarburization leads to a reduction in hardness after quenching. Therefore, it is advantageous to heat the material in a vacuum oven.
I opted for less technically demanding procedure. Steel is wrapped in foil refractory and thus does not react at elevated temperatures with oxygen. Before quenching the film removed. The steel surface remains only a thin coating of oxide.
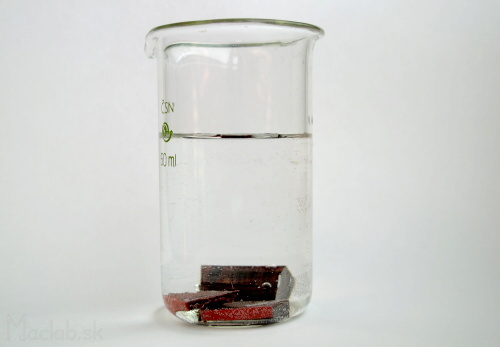
The actual quenching takes place by rapid cooling of steel from a temperature of 1050 ° C by means of mineral oil to a temperature of 300 ° C. Then followed the gradual cooling of the air, in order to prevent cracking. Immediately after quenching followed by tempering needs. This removes internal stresses after quenching, which can cause cracks. Žíhanín at high temperatures reduces koróziivzdornosť steel. I am the chosen annealing temperature of 150 ° C for 2 hours. After such heat treatment reaches 62 HRC blade hardness.
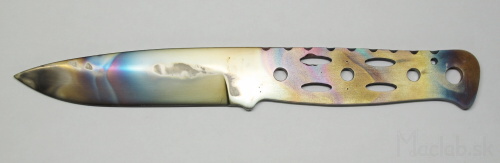
Color nitrogen after hardening just grind fine sandpaper.

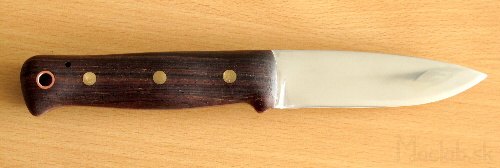
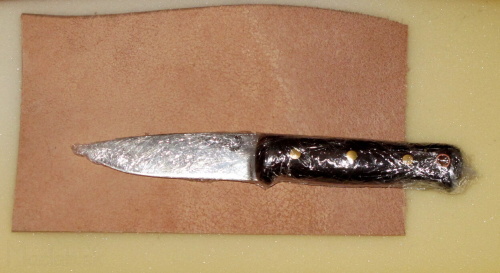
Finally, sharpen the blade and polish sharp blade.
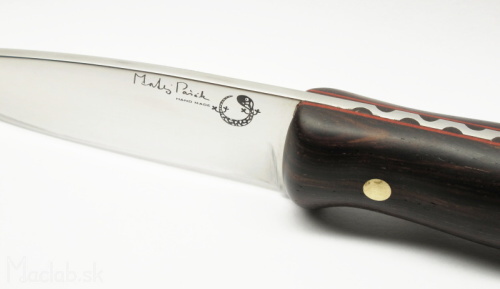
Engraving
Laser engraving is easier than etching or engraving. The next image we need to be converted into curves, after which then moves laser footprint. Polished blade has a high reflectivity and thus must be smeared matte powder. This powder is laser bake in a metal surface, thereby improving image contrast.
When you can have your custom knife signed Ray Mears or Bear Grylls, so why not someone else.
Handle
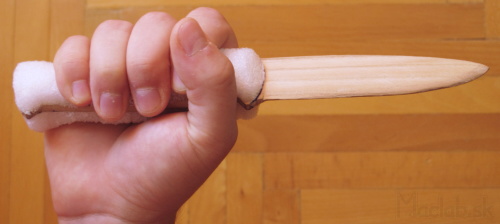
First, think about the shape and proportions of the knife handle. On the wooden model of foam paste, cut by KOTRA in such a shape that fell into the best hands.

Both sides should be symmetrical.
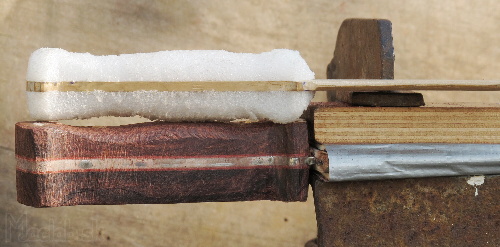
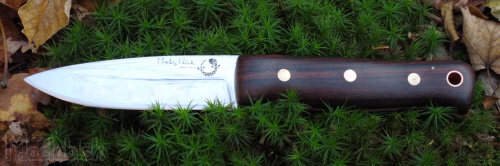
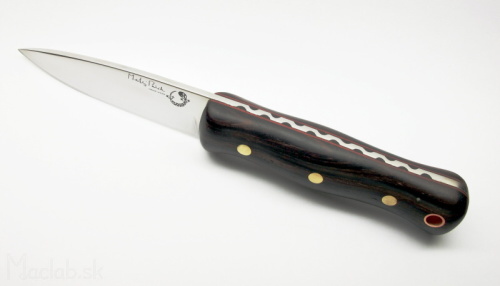
If you already have a cooling-off shape of the handle, select the material. I chose Cocobolo - exotic hardwood.Interestingly, the density of wood is greater than the density of water.

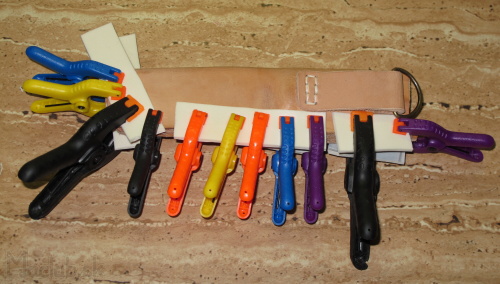
Wood beam longitudinal prerežeme. Crooked hand we cut the glue from the outside. On the flat side of the fiber paste. Fiber improves dosadnutie and paste wood to metal. Both pieces of wood pressed against each other and arrange the clips. To each nezlepili, we include two layers of plastic film some. I used two-component epoxy adhesive.
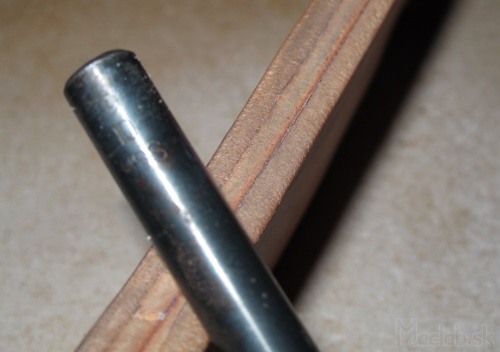
During the drying glue to cut logs (moadznú rod). Collide at the ends of edges to be inserted into the rivet holes nezasekávali. The same we do with a tube cutter for hanging.

After drying the paste adhesive tape cutter on a piece of wood. According to the holes in the metal hole drilled for rivets. After drilling each hole to insert a thread that is not really a knife.
We choose the rivets and glue tape a second piece of wood. So far, deepen drill holes through the second piece of wood so that everything nicely into each set.
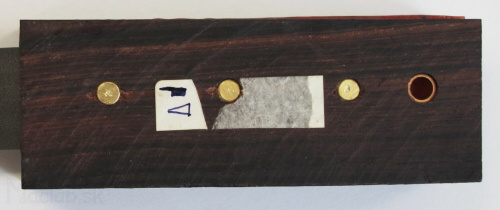
If we drilled the well, rivets should accurately fit into drilled holes.
To attach the fiber knife, insert rivets and metal obreslíme line.
Scheme to handle indicates when the timber will extend the blade.
Odrežeme excess wood a few millimeters from the contour line. It would be best to use a band saw.
Coarsely cut strienky to handle.
Strienok curl on the blades have to create before gluing, then it will not get to him. We will use the template and handles on the outside of the curl indicates.
Strienky rivets will connect to the curl symmetrically on both sides.
Created and annihilated curl.
The last time you tested that everything fits. Coat the blade with tape and we stick to the knife strienky. I sompoužil two-component epoxy adhesive strength 150kg/cm 2 .
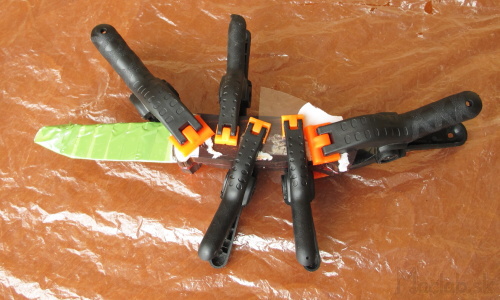
Prilepíme strienky a pritlačíme ich svorkami. Necháme zaschnúť lepidlo aspoň niekoľko dní.

I nerozklepával rivets, as well as I odbrusovať much material. I just watered them with glue. When cutting a loading force still does not work for extruding timber rivets
Even while I was gluing the transparent epoxy glue to add a little powder and brown colouration that I glue ornaments filled fileworku.
Pilníkov grinds the wood to the level contours of the blade.
Then turn the knife, according to a foam model also generate roughly hips. Around the rivets is the face of very difficult. Wood is softer than the thread, so rather rubbed. We have to be careful.
Details tightened best thin round files.
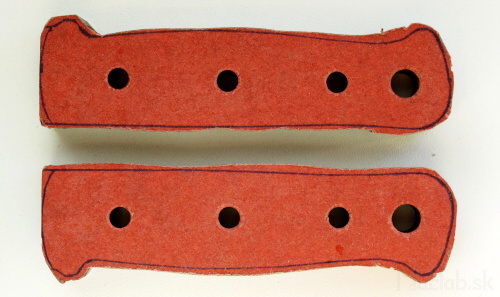
Roughly trimmed shaped handles.
Sandpaper scratches destroyed from the file. Just grit to 240, otherwise the wood is very smooth and slippery. I used thin strips, which I went back and forth as the polishing shoes.
Polished wooden handle.
Tritium
Tríciové tube issue on the principle of light isotope of hydrogen. They are good to identify things that need to find after dark. If the glass breaks and the gas escapes, light tube has already issued. If the break but the gas remains in a bubble of glue fragments in the gas is lit.
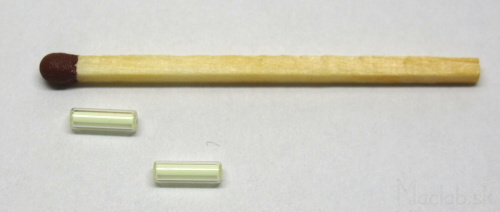
I used the dimensions of 6x2mm.
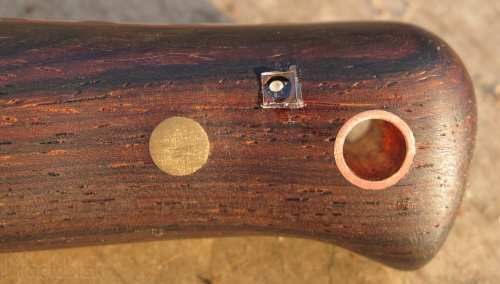
Tube inserted into pre-drilled hole and pour in a transparent adhesive. Attention, classic superglue is not entirely clear.
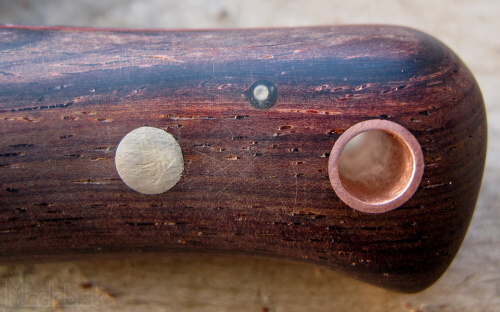
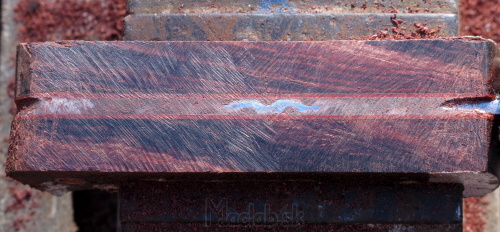
After drying adhesive sandpaper and polish destroy.
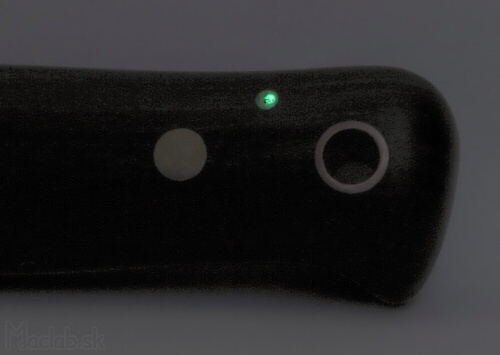
On each side of the knife I had a different color, so I knew how the knife is rotated when it is placed somewhere in the dark.
Finally, I handle then top with beeswax. Wood and cloth dryer nahrejeme rub into the wood.
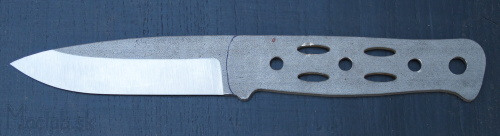
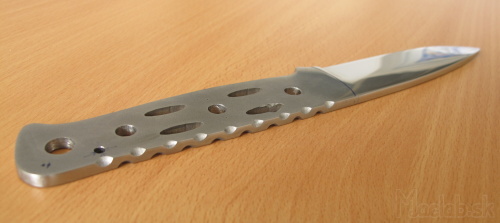
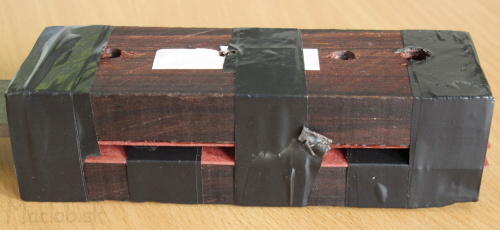
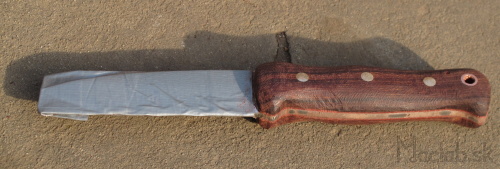
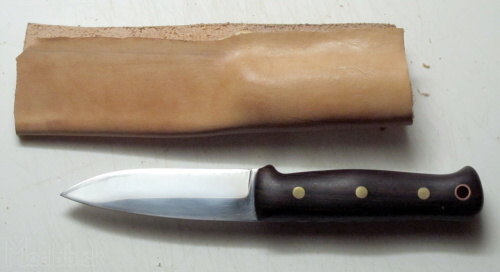
The final product
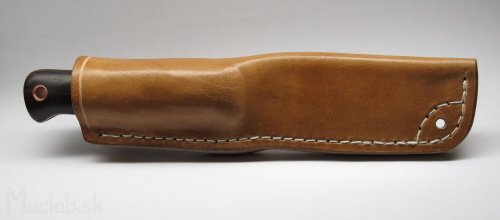
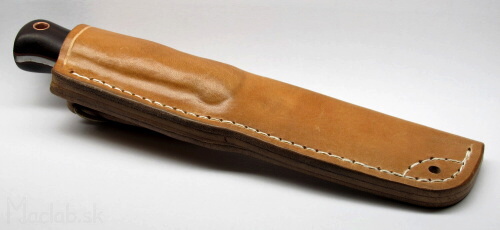
How to make an leather sheat for knife
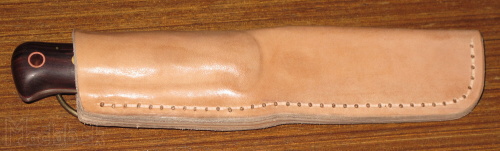
The knife is the case. Protects blade and allows you to have it always at hand. There are many types and procedures for the production of housing for a particular purpose. At the beginning, it is appropriate to choose something simple.
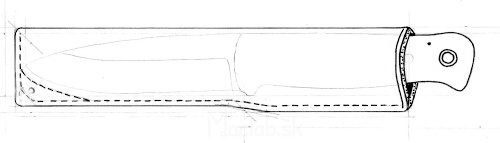
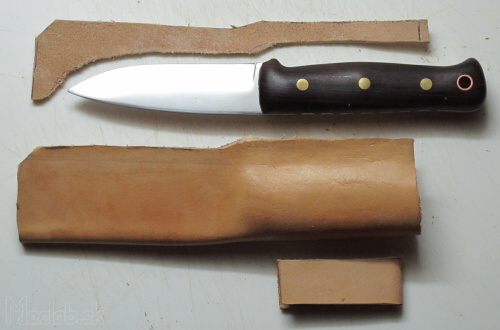
On paper, the paper traces out a knife and a model around it to indicate the proportions of the housing. Gain a better idea how it will eventually look like.
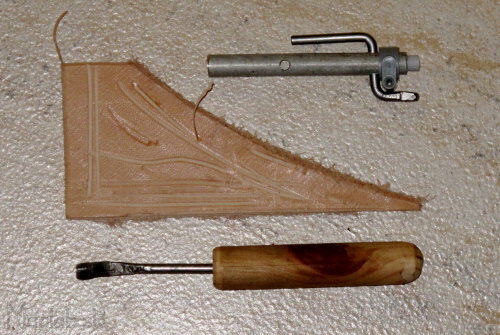
As the material I chose cow leather thickness of 3mm. The working of the skin requires at least some basic tools: punch, folding and grooving. We can buy them or produced. Since I only used them once, I walk through their production.
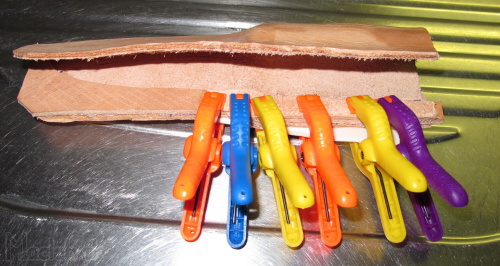
Odrežeme piece of leather, slightly larger than the final dimensions will be the case. The skin is soaked in water. Knife in the food wrap film.
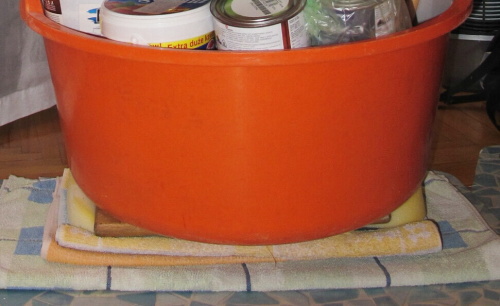
If the skin is softened, packed up her knife, cover with plastic foam and tape. I filled the washbasin things that could have put together an estimate to 30 kg.
After several hours of case under the weight pull. The skin is shaped by the knife. Leave to dry slowly.
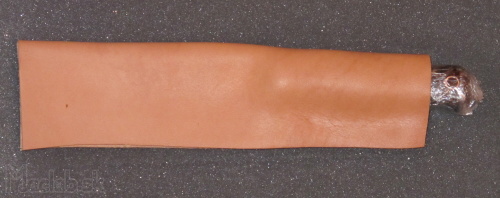
After drying, trimming excess edges of the skin, so that there are about 1 cm space on the suture.
Prepare strip of skin that will be affixed between the layers. Improves penetration of the blade into the housing and prevents cutting the thread.
While paste to one side. I had to put two strips on the side. As for drying, the case boiled down a bit more than I expected.

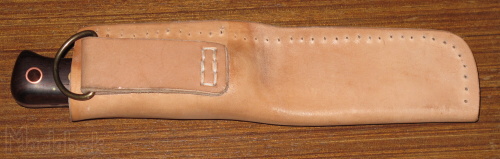
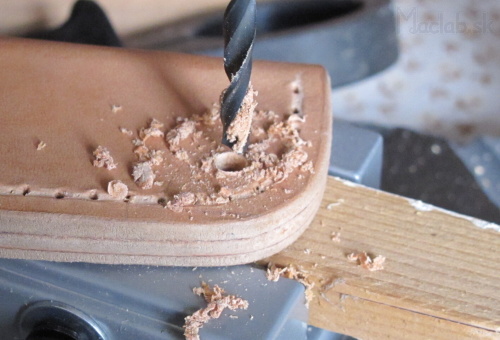
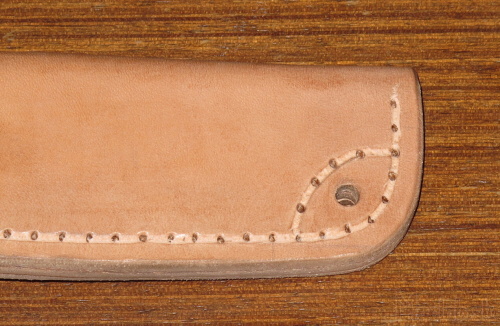
Strap to hang the belt must be done before such Bonds together both sides of the casing. First paste it to hold in place until it sew. Indicates the spacing of holes for stitches. I used an ordinary fork.
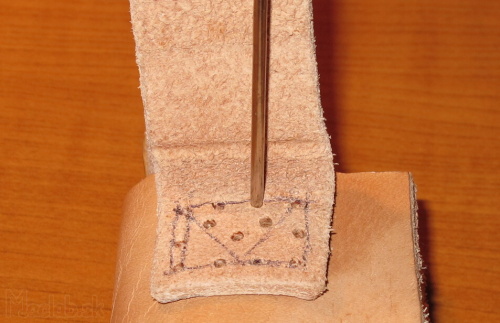
Established or thin-tipped drill bit breaks or holes in the skin. It is better to use a site such as auger holes because over time they start to.
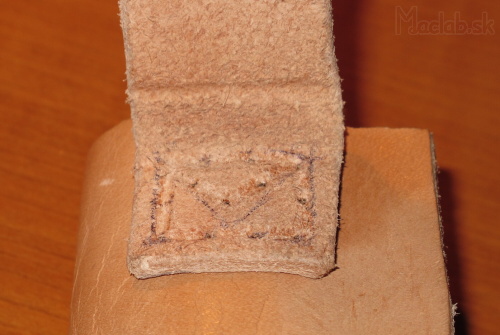
Among the holes do groove. The thread groove will be protected from chafing.
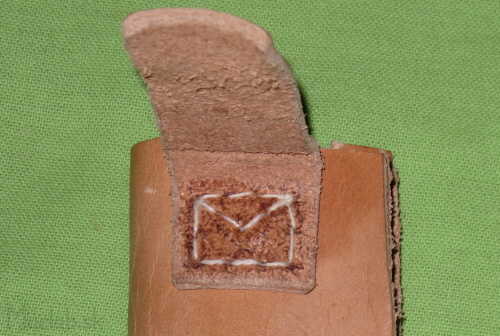
Dierky prešijeme jedným ťahom najlepšie sedlárskym stehom. Ja som nakoniec nite ešte pretrel lepidlom, aby som ich spevnil. Lepidlom som zatrel stehy aj z vnútornej časti, ktorá bude skrytá v púzdre. Pozor, tam kde kvapne lepidlo už nechytí farba na kožu.
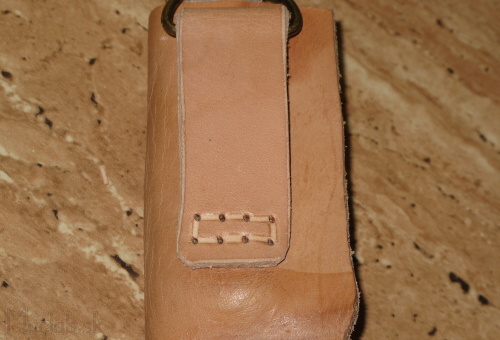
Similar procedure to attach the bottom of the tabs.
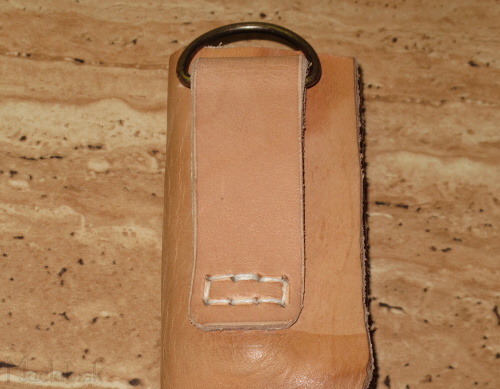
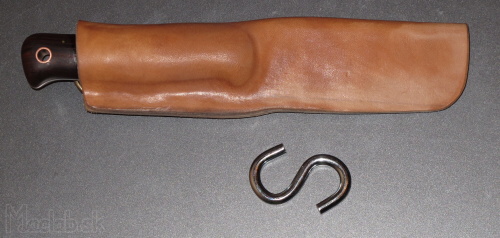
I have also been incorporated into the brass eyelets polkrúžok to hang loose.
If the strap can be attached to both parts of the casing stick. Pins must be supported by something, otherwise pushed into the skin.

After drying glue pieces of excess skin resurfacing zrežeme edges and sandpaper.
Moisten the edges and then destroy. Traditionally, it uses the horn, but I used the opposite side of the drill.
Moisten the surface casing and rounded object stroking its surface. Thus it takes shape and, moreover, remove the skin and wrinkles odtlačeniny.
After drying, the housing groove to create a thread for its entire length.
Indicates the spacing of holes and breaks.
On the back of the case runs out sometimes punch a little off. Therefore, I will do first hole and then connect the dots groove.
Since it is on the reverse side, which is not seen much I nebabral with it.
To the left edge, which is all backed leather strip inserted, drill a hole.
Enclosing the recessed hole and pierce holes.
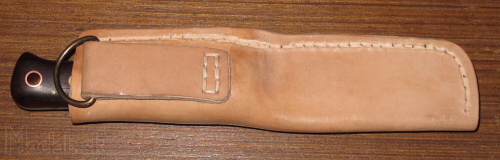
Dyeing and waxing
Now we can treat the skin surface. Preparations to prevent skin cracking and increase its resistance to mildew and moisture. Often contain pigment to highlight colors. We have to be applied before stitching, otherwise the thread zafarbila and did not seem to be pretty.
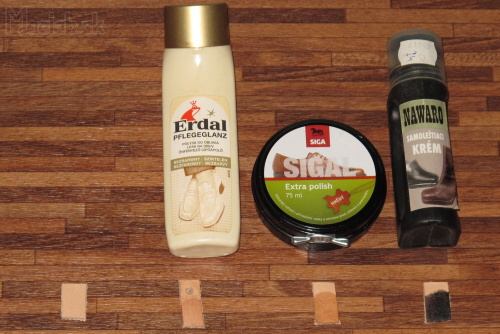
Samples of paint left: none, transparent, brown, black.
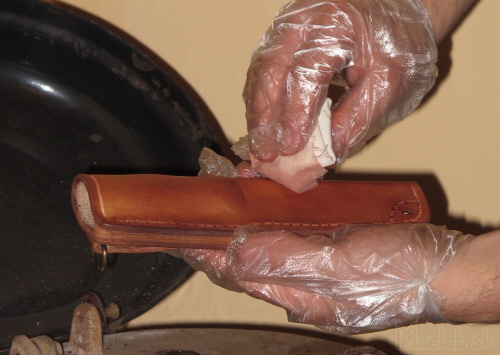
Most liked brown shoe polish. Preparations are based waxes, so housing warmed over a fire or dryer, so the wax is absorbed into the skin better.
Case let cool cloth and polish it.
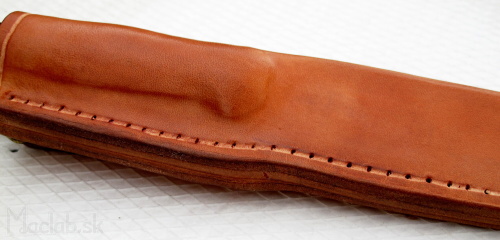
Saddle Leather
The last operation is sewing. It is best to use a blunt needle, the tip Do not floss or skin. I sanded the tips initially sharp needles.
Waxed floss to nestrapkala, and nezadŕhala nezafarbila from preparations to the skin. I stitch for 25 cm consumed approximately 2 m thread. At both ends of the string needle thread. The first threaded hole half the length of the thread. From here we begin as a simple saddlery seam stitch.

One hole is threaded at each end of the thread from both directions.
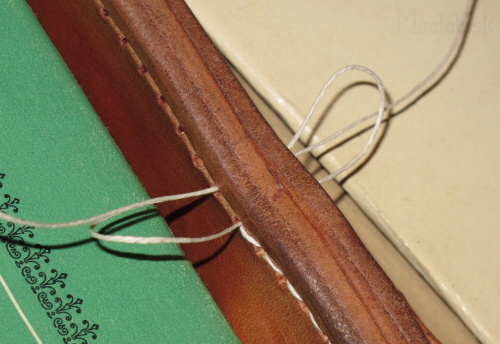
One end of the thread created on the opposite side of a single loop.
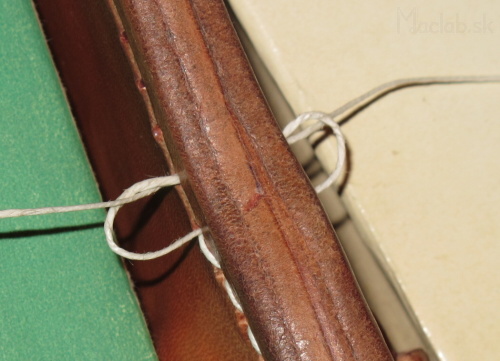
On the one hand threaded the top thread loop on the other hand, the lower loop. To create the half-knot. This procedure must be respected at all times just to be nicely balanced stitch.
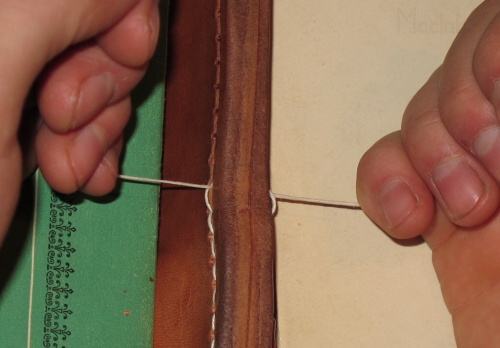
Both ends of the thread and tighten the knot pulls into the pits, where tightened. We continue sewing all along.At the end prešijeme few holes again in the opposite direction. The thread is cut off and the case finished.
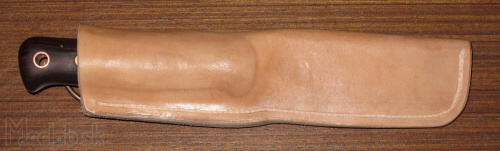
Finished Case